Unless you are blessed with fertile soil in your neck of the woods, I have found that most Australian suburban developments are built in areas that have been stripped of precious topsoil and left barren or covered over with a thick blanket of builders rubble.
The remaining substrate may be sand or clay, each having its own issues. Sand doesn’t hold water very long and lacks essential nutrients, and clay either dries as hard as concrete or is so dense when it’s wet that tender roots find it difficult to penetrate.
So what is the suburban gardener to do? Well for those lacking space, we’ve already covered growing in tight spaces, but what about all of you who have a decent amount of open area in which to plant?
Well the long-term solution would be to build up the soil with a mountain of organic matter in the form of compost to increase or decrease the water retention capacity of your soil, but there is an easier way to start growing quickly.
Growing Food in Raised Beds
The easiest way to get food on the table when you have poor soil is to build up your soil by growing food in raised beds. The good thing is that there are many cost-effective ways to do this, but in the end the simple fact is that you have to import good soil or compost in to get started.
Over the years, you can make your own soil using the efforts of your chickens, or uses as much garden waste as possible to turn into humus from compost and at the same time adding essential nutrients back into your growing areas.
So here are a few ideas that I have used or seen to create amazingly fertile garden beds.
Hard Wood
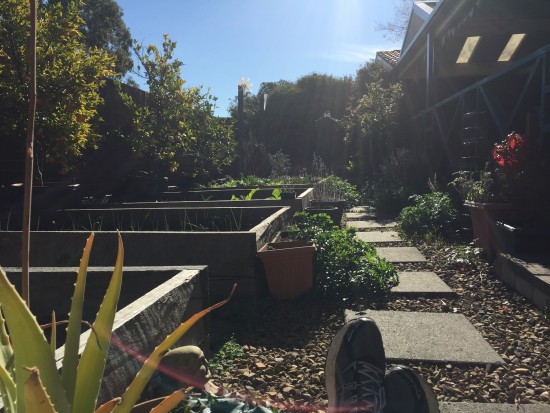
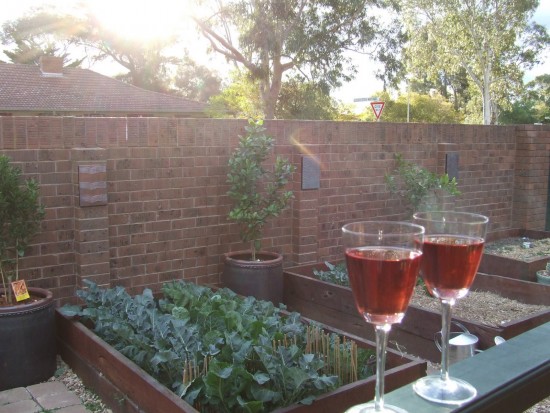
The majority of raised garden beds around my home are made from reclaimed or sustainably harvested red gum hardwood. This type of building material is long-lasting and rots very slowly over time. The only drawback is that if you live in a termite prone area, then they serve as food for them and last half as long.
When building your beds, make sure that they are wide enough to reach across, and if you are prone to back issues, then build them up using reclaimed brick first to add some height. I built ours 2.4 x 1.2 x .5 metres in size. I find it a practical growing space for a couple of varieties of vegetable.
Corrugated Iron
Many of the newer raised garden beds that you can purchase are made from corrugated iron or Colorbond. Most are an elliptical shape to remove any sharp edges and stand about 80 – 100 cm tall. These are ideal for people with mobility problems and can be maintained without too much bending.
They are easy to construct and usually only require a couple of spanners and are long-lasting. As these beds are so tall, they are easy to set up as wicking beds, however if not uses as wicking beds, you may need to throw in about 30 cm (1 ft) of rubble into the bottom to save the requirement to add so much topsoil or compost.
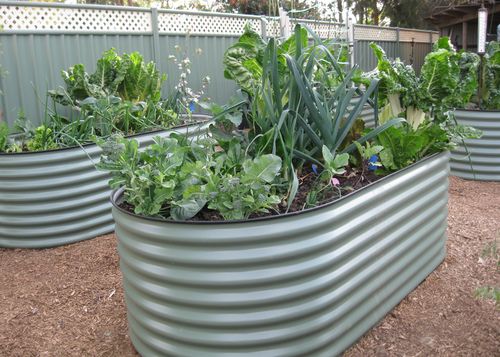
Colorbond garden beds. Source: http://gippslandtanks.com.au/garden_beds
Wooden Pallets
With a little extra wood fastened around all the edges, wooden shipping pallets can be utilised as a raised garden bed. You may think that they are not tall enough, but you will be surprised to know that most vegetables only put down roots that are less than 20 cm in length. This makes a wooden pallet ideal when the spaces are filled with salad greens, tomato plants, or even sweet corn. Root vegetables are not suited for this shallow type of raised bed.
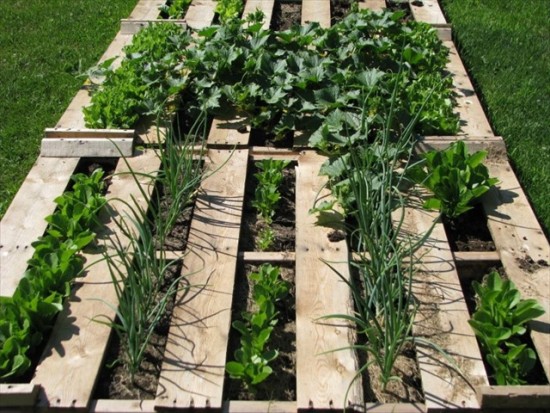
Wooden pallet vegetable garden. Source: Flea Market Gardening
Reclaimed Brick
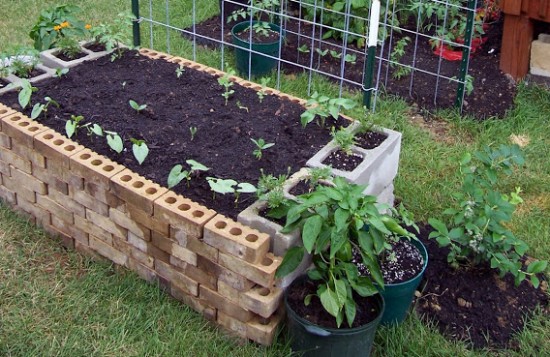
If you have or can get your hands on old brick, large or small, then you can put them to good use as the boundary of your garden bed. You may have to fasten them using a bit of mortar before adding the soil, however if you have large besa bricks or cinder blocks, then these, when filled with dirt, will support the soil in your raised garden beds without issue. The great thing about brick is that you can form just about any shaped bed you like to accommodate the space you have unlike wood which would need multiple cuts to achieve the same outcome.
Large Tyres
Large truck or tractor tyres made a good raised garden bed, as they hold a lot of soil. You don’t need any construction skills to quickly get this type of garden bed started. When I have used tyres, I just cut off the rim with a jigsaw to provide more growing space. You will need to drill a large hole first so as to insert your jigsaw blade to start off.
Most crops can be grown safely in tyres as long as the edible part of the vegetable is above the ground. This excludes potatoes as research has suggested that growing potatoes in tyres risks chemical contamination of the edible tubers.
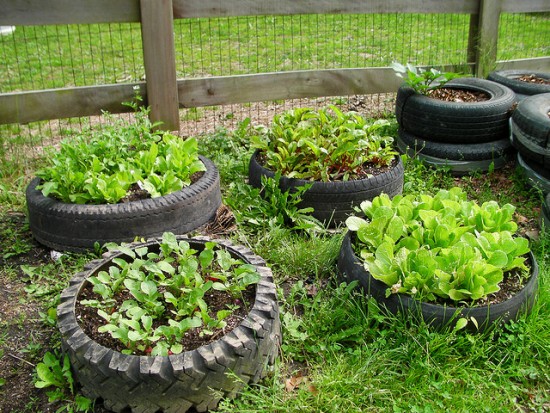
Truck tyre raised garden beds. Source: Flickr creative commons
Building The Soil
Once your bed is constructed with whatever material you choose, the next step is to build up the growing medium.
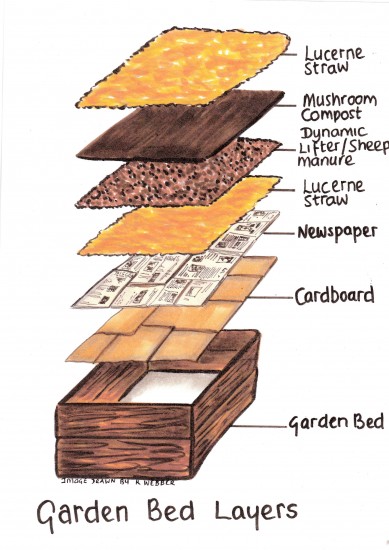
Here is how we initially built up each bed then added more home-made compost on top over the years. I filled the beds in the following order.
- The first layer was a thick cover of cardboard and newspaper about 5 sheets deep. This ground cover was to kill the weeds, grass and provide food for the earthworms.
- Next was a 10 cm layer of either Lucerne hay or pea straw. I chose pea straw and the added bonus was a quick crop of field peas!
- The third layer was a 2 cm layer of Dynamic Lifter (you can use well-rotted sheep or chicken manure). For the four beds I finished off an entire 25Kg bag of very smelly Dynamic Lifter.
- I then covered the manure with another 5 cm layer of pea straw and then a layer 20 cm thick of mushroom compost garden mix. It was a 50-50 mix of mushroom compost and a loam type soil that was filled with organic matter and very suitable for the purpose of growing vegetables.
- Lastly, I topped it off with a 5cm layer of sugar cane mulch, to help conserve water by stopping evaporation.
Over time the organic matter rots down and build up the soil. The vegetables thrive in the first couple of years, but you have to add more compost and manure to keep the nutrients flowing.
Get Building and Growing!
So there are a few ways you can grow veggies in your own suburban food bowl even if you have the poorest soil in the country!
There should be no obstacles for growing food and making your backyard a suburban food bowl.
Go on. Get growing!

Very well written Gavin! I dont have raised beds, but covered the veggie garden area with wet cardboard and then a very thick layer of the muncipal compost, topped by hay. Slowly I have added compost as I make it and the occasional bag of manure, but it is important to note that you dont need to go out and buy expensive ingredients. Use what you have available and keep adding to it. The important thing is to start gardening, not to wait until you can afford to build the beds, and then fill them with purchased ingredients.
Great tip Gillian. Yes, you certainly don’t need expensive garden beds to start gardening!
Hello Gavin, if you are building your bed on a lawn (couch grass) do you recommend digging out the grass first or is layering over it with cardboard and newspaper sufficient. Thanks!
Couch grass is a pain. Best to dig it up if you can, but I layed very thick cardboard over my grass and it hasn’t grown through after 8 years!
Another good one in a great series, Gav. I love the 2 glasses of wine on the railing! The pallet bed is fantastic! Built-in straight rows; how clever is that?
I have put together a raised colour bond bed and want to make a wicker bed, do I still have to line it in plastic and if so how do a prevent the screws that are on the inside from making hole in the plastic. I have it sitting on a bed of pavers and was laying plastic inside then gravel/small rocks with the irrigation pipe already on the bottom, then was told to put shade cloth and then the soil. Is this correct. Jayne .